Using Colour Theory to Achieve Realistic Mural Art
Have you ever wondered how to make your mural paintings look incredibly realistic? Using colour theory to create depth and dimension can turn your murals into hyper-realistic masterpieces. Let me walk you through the process I used to paint a hyper-realistic face for a client. You’ll learn practical techniques that you can start using right away.
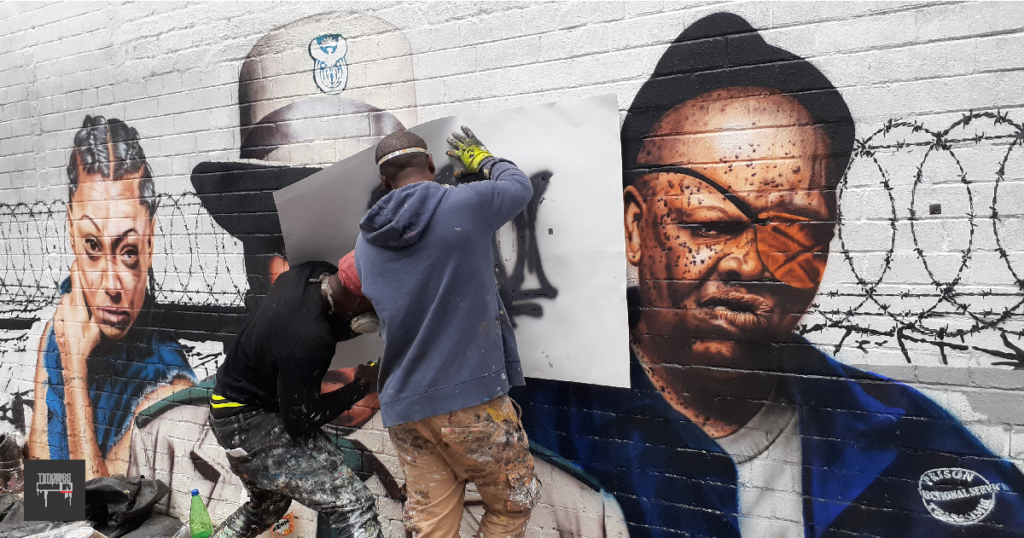
Start with a Detailed Stencil
I began by creating a highly detailed stencil. This stencil outlined the entire artwork, including the character’s faces. Creating a precise stencil is crucial because it sets the foundation for your painting.
Mix the Right Colours
Next, I mixed the colours needed for the various elements of the composition. For the face and skin tones, I used a combination of:
- Black
- Golden-Brown
- Gungston-Orange
- Cream
- Postoffice Red
- Royal Blue
- Light Grey
- Sunshine Yellow
These colours, although not all visibly distinct, added layers of transparent tones that created depth and realism.
Outline and Build the Base
With the stencils in place on the wall, I outlined the entire piece using a light colour like orange. This step helps to prevent disruptive marks and keeps the outline visible yet unobtrusive.
I started building the skin tones from the lightest to the darkest. First, I applied a base skin tone using cream. This colour served as a light enough background to host the darker tones and noticeably highlight the shiny areas of the face.
Apply Gradual Paint Layers
To define the deep contours, I applied paint heavily on the low points and faded it out on higher points like the cheeks, nose, and chin. This technique, using the gradual paint application method, helps create a realistic depth.
Step-by-Step Paint Application
- Base Layer:
- Apply the cream colour as the base skin tone.
- Defining Contours:
- Use golden brown for deeper contours.
- Apply paint heavily on low points and fade out on higher points.
- Building Mid-Tones:
- Gradually layer postoffice red to add a light shade of pink-orange on the lips.
- Adding Highlights and Shadows:
- Use sunshine yellow and light grey for highlights.
- Define the darkest parts like eyelashes and hair with gloss black.
Leverage Soft Paint Edges
One of the key techniques I used was leveraging the soft paint edges of aerosol spray paint. Here’s how:
- Gloss Black for Contrast:
- The solid middle spray of gloss black created a good contrast, making the image pop.
- The soft edges of the gloss black enhanced the gungston-orange and golden brown tones that dominated the face.
By understanding and applying these techniques, you can create realistic depth and dimension in your mural art.
Practical Assignment
To help you practice, here’s a simple assignment:
- Create a Stencil:
- Sketch out a detailed line drawing of a face and create a stencil.
- Mix Your Colours:
- Use the colours listed above to mix your paints.
- Apply the Base Layer:
- Start with the cream colour as your base.
- Build Gradual Layers:
- Use the techniques described to add mid-tones, highlights, and shadows.
- Experiment with Soft Edges:
- Practice using the soft edges of aerosol spray paint to blend and enhance your colours.
Conclusion
By mastering colour theory and paint application techniques, you can bring incredible depth and realism to your murals. Remember, practice makes perfect. The more you experiment and apply these techniques, the more confident and skilled you will become. Now, grab your paints and start creating your own masterpiece!
Good morning hope this finds you well can you please help me with the quotation for wall murals advert